Beneath your roofing material – be it shingles, metal, or tile – lies a critical component often overlooked: the roof sheathing, also known as roof decking. This flat, structural layer forms the solid base to which your roofing materials are attached, playing an indispensable role in your roof’s overall strength, stability, and weather resistance. Understanding the basics of roof sheathing is essential for any homeowner undertaking a roofing project, as it directly impacts the longevity and performance of the entire system.
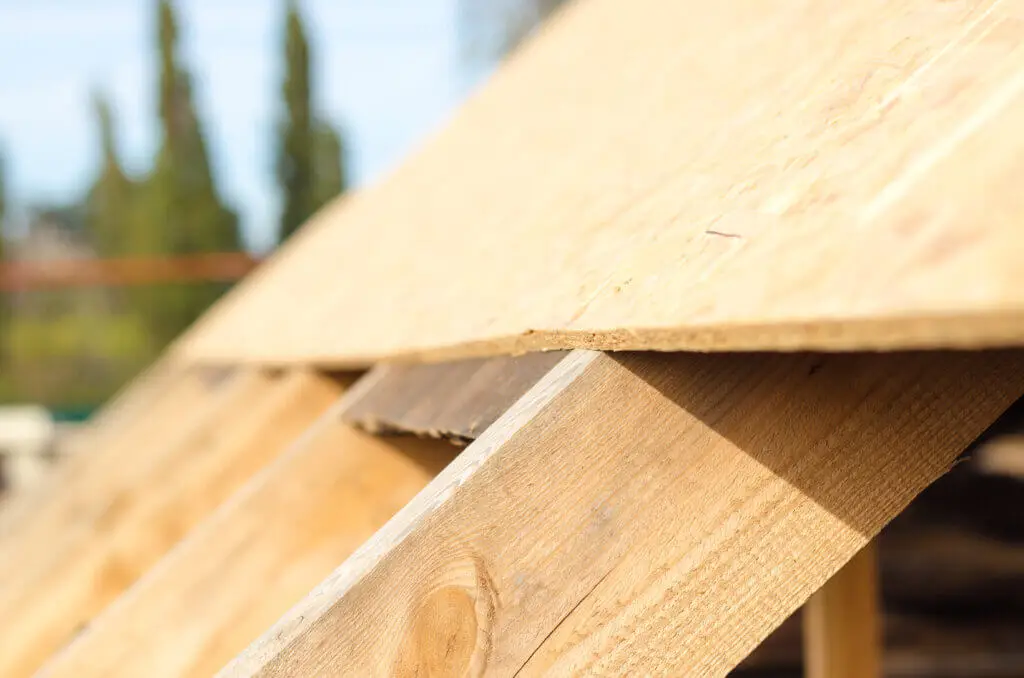
Roof sheathing basics
Roof sheathing is a structural panel product installed directly over the roof trusses or rafters, forming a continuous deck. Its primary functions include:
- Structural Support: It ties the roof rafters or trusses together, creating a rigid diaphragm that adds immense structural stability to the entire roof system. This helps the roof withstand high winds, seismic activity, and the weight of snow and ice.
- Nailable Surface: It provides a continuous, smooth, and secure surface for fastening the underlayment and final roofing material (shingles, metal panels, tiles, etc.). Without solid sheathing, roofing materials cannot be properly secured.
- Load Distribution: It distributes the weight of the roofing materials and environmental loads (snow, wind) evenly across the roof framing.
- Protection: It offers a temporary barrier against the elements during construction, and a secondary line of defense against moisture should the primary roofing material be compromised.
Common materials used for roof sheathing include Oriented Strand Board (OSB) and plywood, each with distinct characteristics.
OSB vs CDX plywood: What’s the difference?
When it comes to residential roof sheathing, OSB and plywood are the two dominant choices, each with its own advantages and disadvantages.
Oriented strand board (OSB)
- Composition: Made from rectangular wood strands or flakes that are arranged in specific orientations (oriented in layers) and bonded together with waterproof resins under heat and pressure. The outer layers typically have strands aligned lengthwise, while inner layers have crosswise alignment, providing strength and stiffness.
- Pros:
- Cost-Effective: Generally less expensive than plywood, making it a popular choice for budget-conscious projects.
- Uniformity: More consistent in density and strength, with fewer voids or knots compared to plywood.
- Dimensional Stability: Can be more dimensionally stable than plywood in terms of width and length, less prone to delamination.
- Available in Large Sheets: Often manufactured in larger sheets than plywood, potentially leading to fewer seams.
- Cons:
- Moisture Sensitivity: More susceptible to edge swelling and can absorb moisture more readily than plywood, especially if exposed to prolonged moisture during construction or due to roof leaks. If it swells, it often does not return to its original dimension.
- Weight: Can be heavier than plywood of the same thickness.
- Fastener Holding: While generally good, long-term fastener holding can be slightly less robust than plywood, especially after moisture exposure.
CDX plywood
- Composition: Manufactured from thin veneers (plies) of wood, typically softwood (like Douglas fir or pine), glued together with exterior-grade adhesive in alternating grain directions. “CDX” indicates the veneer grades (C-grade face, D-grade back) and “X” for exterior glue, meaning it can withstand some moisture exposure during construction.
- Pros:
- Moisture Resistance: Generally holds up better to intermittent moisture exposure during construction without significant swelling. Dries out more effectively if it gets wet.
- Superior Fastener Holding: The cross-lamination of veneers provides excellent fastener withdrawal resistance, making it very secure for roofing nails.
- Structural Integrity: Strong and rigid, particularly against bending forces.
- Cons:
- Higher Cost: More expensive than OSB.
- Voids/Knots: Can have small voids or knots within inner plies, though quality control minimizes this for roofing panels.
- Weight: Can be heavy, depending on thickness.
Choosing Between Them: For most residential roofing applications, both OSB and CDX plywood are acceptable under building codes. The choice often comes down to budget, regional availability, and installer preference. Many roofers prefer CDX plywood for its moisture resistance during the construction phase and superior fastener holding, justifying the slightly higher cost.
Ideal thickness for roofing plywood
The required thickness of roof sheathing depends primarily on the spacing of your roof rafters or trusses. This relationship is critical for ensuring adequate structural support and preventing sagging.
- Common Thicknesses:
- 7/16 inch OSB (equivalent to 15/32 inch plywood): This is the most common and often minimum thickness used for roof sheathing when rafters or trusses are spaced 16 inches on center (o.c.).
- 1/2 inch OSB (equivalent to 19/32 inch plywood): Often used for 16-inch o.c. spacing for added rigidity, or as a minimum for 24 inches on center (o.c.) rafter/truss spacing.
- 5/8 inch plywood (23/32 inch): Typically used for wider rafter/truss spacing (e.g., 24 inches o.c.) where extra strength is needed, or for roofs that will experience very heavy snow loads.
- Edge Support: Regardless of thickness, it’s crucial to use H-clips (panel clips) between sheets along unsupported edges (i.e., where a panel edge doesn’t fall directly on a rafter/truss). H-clips provide additional edge support, prevent differential deflection between panels, and contribute to the overall rigidity of the roof deck. They are typically required when panels are installed perpendicular to framing on 24-inch o.c. spacing.
- Building Codes: Always check your local building codes, as they specify minimum thickness requirements based on rafter/truss spacing and anticipated loads (e.g., snow loads).
Building code requirements
Building codes play a crucial role in ensuring the safety, structural integrity, and performance of roofing systems. Adhering to these codes is not just about compliance; it’s about protecting your home.
- Minimum Thickness: Codes specify the minimum sheathing thickness based on rafter/truss spacing and expected live/dead loads (e.g., snow, wind, weight of roofing materials). As mentioned above, 7/16″ OSB or 15/32″ plywood for 16″ o.c. spacing is common.
- Fastening Schedule: Codes dictate the type, size, and spacing of fasteners (nails or screws) used to attach the sheathing to the rafters/trusses. This ensures proper uplift resistance during high winds. Common requirements are 8d nails at 6 inches on center along panel edges and 12 inches on center in the field (intermediate supports).
- Panel Orientation: Sheathing panels are typically installed with their long dimension perpendicular to the roof framing (trusses/rafters) for maximum strength and stiffness.
- Edge Spacing: Small gaps (e.g., 1/8 inch) are usually required between sheathing panels to allow for expansion due to moisture and temperature changes, preventing buckling.
- H-Clips/Panel Clips: Often required by code to provide intermediate support between rafters/trusses, especially for 24-inch o.c. spacing.
- Sheathing Grade: Codes may specify the required grade of OSB or plywood (e.g., “Exposure 1” rated, indicating it can withstand some weather exposure during construction).
- Fire Ratings: In some areas, particularly in wildfire-prone regions, specific sheathing materials or assemblies may be required to meet certain fire-resistance ratings.
Always consult with your local building department or a licensed roofing contractor to confirm the specific building code requirements in your area before starting any roofing project.
Moisture resistance and durability factors
While roof sheathing provides temporary protection, its long-term durability and performance are heavily influenced by how it handles moisture.
- Importance of WRB and Roofing: The primary line of defense against moisture is the roof’s outermost layers: the roofing material itself and the underlayment (e.g., asphalt felt, synthetic underlayment, ice and water shield). The sheathing is a secondary line.
- Exposure During Construction: Sheathing can be exposed to rain and humidity during the construction phase. Plywood generally tolerates this better than OSB, which is more prone to edge swelling if it gets wet and stays wet. If OSB gets significantly wet, it may not return to its original dimensions, leading to a wavy roof deck.
- Ventilation: Proper attic ventilation is critical for sheathing durability. Good airflow helps to:
- Prevent Moisture Buildup: Removes humid air that can lead to condensation on the underside of the sheathing, causing rot or mildew.
- Regulate Temperature: Reduces heat buildup in the attic, which can prematurely age roofing materials and contribute to sheathing degradation.
- Ice and Water Shield: In colder climates, or areas prone to ice dams, applying an adhesive ice and water shield membrane directly to the sheathing along eaves, valleys, and around penetrations provides superior waterproofing, protecting the sheathing from ice-related moisture intrusion.
- Quality of Installation: Incorrect fastening, improper flashing around penetrations, or inadequate underlayment installation can lead to leaks that directly compromise the sheathing’s integrity.
- Long-Term Leaks: Even a small, slow roof leak that goes unnoticed can saturate and rot sheathing over time, requiring costly repairs.
When to replace existing roof decking
During a roof replacement, the contractor will typically inspect the existing roof decking. Not all sheathing needs to be replaced, but certain conditions warrant it.
- Visible Rot or Decay: Any sheathing that shows signs of rot, decay, or significant mold growth due to past or current leaks must be replaced. This wood has lost its structural integrity.
- Water Damage/Delamination: If plywood layers are delaminating (separating) or OSB is severely swollen (especially at the edges) and not returning to shape after drying, it needs replacement. This indicates it has been compromised by moisture.
- Sagging or Weakness: If the sheathing sags between rafters/trusses, feels spongy when walked on, or has visible signs of structural weakness, it must be replaced.
- Pest Infestation: If there’s evidence of active or past pest infestation (e.g., termites, carpenter ants) that has compromised the wood, replacement is necessary.
- Improper Thickness/Spacing: If the existing sheathing is found to be too thin for the rafter/truss spacing (e.g., 1/2-inch sheathing on 24-inch o.c. framing that is sagging), or does not meet current building codes, it should be upgraded.
- Multiple Layers of Roofing: If the existing roof has multiple layers of old roofing materials (e.g., shingles over old shingles), and the sheathing shows signs of stress or improper fastening, replacement may be recommended to provide a clean, solid base for the new roof.
- Converting to a Different Roof System: If you are changing the type of roofing material (e.g., from lightweight asphalt shingles to heavy slate or tile), the existing sheathing may need to be upgraded or reinforced to handle the increased weight.
A thorough inspection by a qualified roofing professional during the estimating phase is crucial to determine the condition of your existing roof decking and advise on necessary replacements, ensuring your new roof has a solid and reliable foundation.