Finishing a basement is a popular way to add valuable living space to your home, and the ceiling plays a crucial role in its overall aesthetic and functionality. While several options exist, a drywall basement ceiling offers a clean, seamless, and polished look that can make your lower level feel like a true extension of your upstairs living areas. This guide explores the benefits, considerations, installation tips, and alternatives for choosing drywall for your basement ceiling.
Why choose drywall over drop ceiling
When deciding on a basement ceiling, drywall and drop (or suspended) ceilings are the two most common choices. Drywall often wins out for homeowners prioritizing aesthetics and a more “finished” feel.
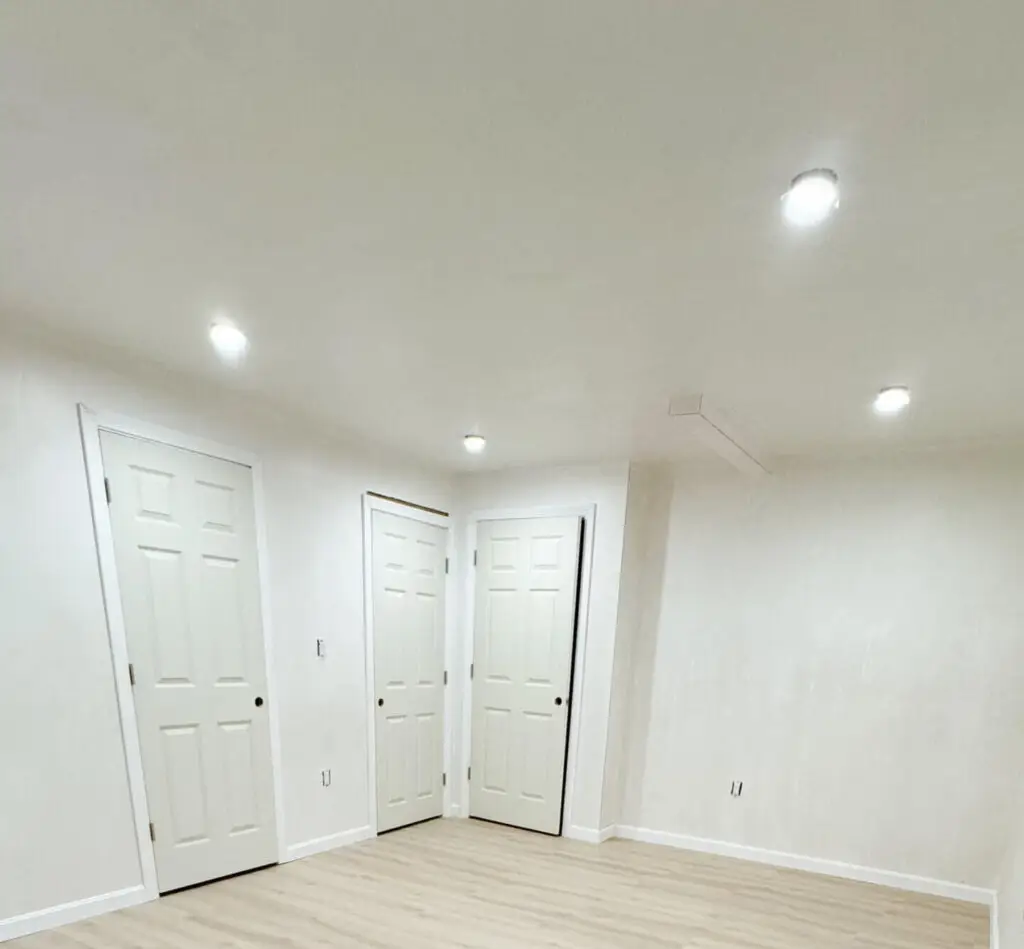
- Seamless Aesthetics: Drywall creates a smooth, continuous surface that can be painted any color, offering a sleek and modern appearance. Unlike drop ceilings, there are no visible grids or seams, providing a truly finished and cohesive look that mimics ceilings found on upper floors.
- Maximizes Ceiling Height: Drywall can be installed directly onto the bottom of the floor joists above, or on furring strips attached to the joists. This minimizes the loss of headroom, which is often a critical concern in basements where ceiling heights can already be limited. Drop ceilings typically require a minimum of 3-5 inches of lost headroom for the grid system.
- Improved Soundproofing: When properly installed with insulation in the joist cavities, a drywall ceiling offers superior sound attenuation compared to standard drop ceiling tiles. This helps to reduce noise transfer between the basement and the floor above, creating a quieter environment.
- Increased Home Value: A drywall ceiling contributes to a more “finished” and high-end feel, which can positively impact your home’s resale value, making the basement feel less like a utility space and more like integrated living area.
- Customization: Drywall provides a versatile canvas for various finishes, from smooth paint to textured applications, and allows for seamless integration of recessed lighting for a clean look.
Pros and cons of drywall in basements
Like any material, drywall has its advantages and disadvantages when used in a basement setting.
Pros:
- Superior Aesthetics: Creates a smooth, continuous, and modern look.
- Maximizes Headroom: Installed directly to joists, it preserves more ceiling height than a drop ceiling.
- Better Sound Control: When combined with insulation, it significantly reduces sound transmission.
- Fire Resistance: Type X drywall provides enhanced fire resistance, which can be important for safety and code compliance.
- Durability: Once installed and finished, drywall is a robust and long-lasting surface.
- Customization: Easily painted, textured, and allows for seamless integration of lighting and other fixtures.
Cons:
- Limited Access to Utilities: This is the primary drawback. Once installed, drywall permanently conceals pipes, ducts, and electrical wiring. Accessing these utilities for repairs or modifications requires cutting into and patching the drywall, which can be messy and time-consuming.
- Susceptibility to Moisture Damage: Drywall (especially standard gypsum board) is vulnerable to water damage and mold growth if exposed to leaks or high humidity. This is a significant concern in basements.
- Installation Complexity & Labor Intensive: Hanging drywall, especially on a ceiling, is physically demanding and requires skill to achieve a smooth, flawless finish (taping, mudding, sanding). It’s typically a two-person job.
- Cost: While material costs for drywall can be lower than some decorative ceiling tiles, the labor involved in installation and finishing often makes the overall cost higher than a basic drop ceiling.
- Messy Installation: Drywall installation, sanding, and painting generate a considerable amount of dust and debris.
Fire code and moisture considerations
Addressing fire safety and moisture management is paramount when installing a drywall basement ceiling.
- Fire Code Considerations:
- Fire-Rated Drywall (Type X): Building codes often require fire-rated drywall (Type X gypsum board) for basement ceilings, especially if there’s a finished living space above or if the basement contains a furnace, water heater, or other combustion appliances. Type X drywall contains special additives that make it more resistant to fire, typically providing a 1-hour fire resistance rating when installed correctly.
- Thickness: While 1/2-inch drywall is common for walls, 5/8-inch Type X drywall is often specified for fire-rated ceiling assemblies.
- Fastener Spacing: Fire-rated assemblies may have more stringent fastening requirements, often calling for closer screw spacing (e.g., 8 inches apart) to ensure the drywall remains in place during a fire.
- Fire Blocking: Ensure proper fire blocking is installed within joist cavities and around penetrations to prevent fire from spreading through concealed spaces.
- Local Codes: Always consult your local building department for specific fire code requirements in your area, as they can vary.
- Moisture Considerations:
- Pre-Insulation Moisture Control: Before installing any drywall, ensure your basement is dry. Address any foundation cracks, exterior drainage issues, and manage interior humidity with a dehumidifier. Never install drywall over active leaks or persistent dampness.
- Moisture-Resistant Drywall: Due to the inherent humidity in basements, it’s highly recommended to use moisture-resistant drywall products:
- Green Board (Moisture-Resistant): Has a water-resistant paper facing. Suitable for areas with moderate humidity, but not direct water exposure.
- Purple Board / Fiberglass-Faced Drywall (Mold-Resistant): Offers superior protection against mold and mildew growth. Fiberglass-faced drywall, in particular, has no paper backing, which is a food source for mold. This is the best choice for damp basement environments.
- Vapor Retarders: In colder climates, a vapor retarder is typically needed on the warm-in-winter side of the insulation to prevent condensation within the ceiling assembly. This is usually achieved by using an appropriate insulation material in the joist bays (e.g., rigid foam or spray foam) that also acts as a vapor barrier.
- Ventilation: Ensure adequate ventilation in the basement to help control humidity levels.
- Mold-Resistant Joint Compound: Use mold-resistant joint compound and fiberglass mesh tape for taping and finishing seams.
Installation tips for a flawless finish
Achieving a smooth, professional drywall ceiling requires patience, the right tools, and attention to detail.
- Plan Your Layout:
- Map out where full sheets of drywall will go and where cuts will be needed.
- Identify the location of all ceiling joists and mark them on the walls or a ledger board.
- Plan for soffits or bulkheads if you need to conceal extensive ductwork or plumbing below the joists.
- Gather the Right Tools:
- Drywall lift (highly recommended for ceilings, especially if working alone).
- Utility knife and T-square for cutting.
- Drywall screws (coarse thread for wood joists, fine thread for metal studs).
- Screw gun with a dimpler bit (prevents over-driving screws).
- Taping knives (6-inch, 10-inch, 12-inch).
- Mud pan.
- Sanding pole and sandpaper/sanding screen.
- Safety glasses, dust mask/respirator.
- Prepare the Joists: Ensure joists are level and free of obstructions. If they are uneven, consider installing furring channels (resilient channels) perpendicular to the joists to create a flatter surface and improve sound isolation.
- Hang the Drywall:
- Start with full sheets whenever possible.
- Position sheets perpendicular to the joists for maximum strength and fewer visible seams.
- Use the drywall lift to hoist sheets into place and hold them while you screw them.
- Drive screws every 8-12 inches along joists, ensuring they are slightly dimpled below the surface without breaking the paper.
- Cut out openings for electrical boxes, recessed lights, and vents as you go, or mark their locations for later cutting with a roto-zip tool.
- Taping and Mudding:
- Apply a thin, even coat of joint compound over all seams and screw heads.
- Embed paper or fiberglass mesh tape over the seams, pressing it firmly into the wet mud.
- Apply subsequent thin coats of joint compound, feathering the edges wider with each coat to create a smooth transition. Allow each coat to dry completely before applying the next.
- Use corner bead for outside corners (e.g., soffits) and paper tape for inside corners.
- Sanding:
- Once all mud coats are dry, sand the surfaces smooth. Use a sanding pole for ceilings.
- Wear a respirator and ensure good ventilation to manage dust.
- Prime and Paint:
- Apply a high-quality drywall primer to seal the surface and ensure an even paint finish.
- Paint with your chosen ceiling paint.
Alternatives for low ceilings
If your basement has particularly low ceilings, drywall might not be the best option as it still consumes some precious headroom. Here are alternatives:
- Exposed and Painted Ceiling:
- Description: Embrace the industrial look by painting all exposed elements (joists, pipes, ducts, wiring) a single, uniform color (often matte black, white, or a dark gray).
- Pros: Maximizes headroom, cost-effective, creates a modern/industrial aesthetic, easy access to utilities.
- Cons: Can look cluttered if not organized, offers minimal soundproofing, dust can accumulate on exposed surfaces.
- Direct-Mount Ceiling Tiles:
- Description: Lightweight tiles (e.g., polystyrene, fiberboard, or decorative tin/metal panels) that are glued or stapled directly to the existing joists or furring strips.
- Pros: Minimal headroom loss, can be DIY-friendly, offers various decorative patterns and textures, can cover minor imperfections.
- Cons: Still no easy access to utilities. Can look less seamless than drywall.
- Stretch Ceilings:
- Description: A PVC or fabric membrane stretched tautly across a track system installed around the perimeter of the room, creating a perfectly smooth surface.
- Pros: Minimal headroom loss, quick and clean installation, waterproof (PVC), can incorporate lighting, offers a modern, high-end look.
- Cons: More expensive, requires professional installation, still limits access to utilities (though some systems allow for partial removal).
- Partial Ceilings/Soffits:
- Description: Drywall is used to create soffits around major obstructions (ducts, pipes) while leaving other areas exposed or using a different, less height-consuming treatment.
- Pros: Hides the most unsightly elements, can create architectural interest, preserves some headroom.
- Cons: Can still reduce overall ceiling height in certain areas, requires careful planning and framing.
Choosing a drywall basement ceiling offers a polished and seamless finish, making your basement feel like a true extension of your home. By understanding the installation process, material considerations, and potential challenges, you can achieve a beautiful and functional lower level.
Ready to transform your basement with a clean and polished drywall ceiling? Greater Boston Contractors specializes in professional basement finishing, ensuring every detail, including your ceiling, is expertly installed for a flawless look and lasting quality. Contact us today for a free consultation and let’s create the basement of your dreams!