Kitchen cupboards are central to your kitchen’s aesthetic, but they can become worn, dated, or simply no longer match your style over time. A full kitchen renovation can be costly and disruptive, making repainting a popular, more budget-friendly alternative. While brush-painting is common, spray painting kitchen cupboards offers a unique set of advantages, providing a smooth, factory-like finish that can dramatically refresh your kitchen’s look. Greater Boston Contractors guides you through the world of spray painting kitchen cupboards, covering its benefits, techniques, and considerations to achieve professional results.
Is spray painting kitchen cabinets a good idea?
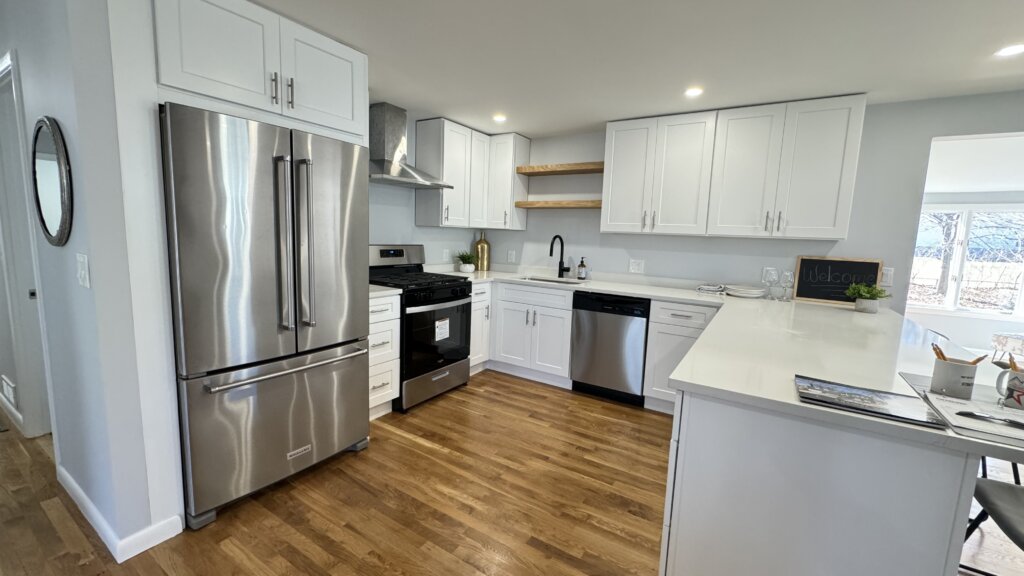
Yes, spray painting kitchen cabinets can be an excellent idea, particularly if you are aiming for a high-end, flawless finish that mimics what you’d see on new cabinetry. When done correctly, spray painting offers results that are difficult to achieve with traditional brush and roller methods alone.
- Smooth, Even Finish: This is the primary advantage. Spray painting minimizes brush strokes and roller marks, resulting in a remarkably smooth and uniform surface, similar to a factory finish.
- Faster Application: Once the extensive prep work is complete, the actual paint application with a sprayer is significantly faster than brushing and rolling, especially for intricate cabinet doors and drawer fronts.
- Excellent Adhesion: When proper preparation is done, spray paint can atomize and get into all the nooks and crannies, promoting superior adhesion, especially on detailed profiles.
- Cost-Effective Renovation: It’s a much more affordable way to update your kitchen compared to replacing all the cabinetry, giving your kitchen a fresh, modern look without breaking the bank.
However, the success of spray painting hinges heavily on meticulous preparation and the right technique.
Pros and cons of spray vs. Brush painting
Deciding between spray painting and brush painting for your kitchen cabinets involves weighing their respective advantages and disadvantages.
Spray painting
Pros:
- Superior Smoothness: Achieves a nearly seamless, factory-like finish without brush strokes or roller textures.
- Faster Paint Application: Once masked and set up, paint goes on much quicker, especially on multiple doors and intricate profiles.
- Even Coverage: Provides uniform thickness and color across the entire surface, minimizing streaks.
- Better for Intricate Details: Easily coats raised panels, moldings, and carved details that are challenging with brushes.
Cons:
- Extensive Preparation: Requires far more masking and protection for surrounding areas to prevent overspray. This is the most time-consuming part.
- Learning Curve: Requires practice to master technique (distance, speed, overlap) to avoid runs, drips, and uneven coverage.
- Equipment Cost: A quality sprayer (HVLP or airless) can be a significant investment for DIYers.
- Ventilation: Requires excellent ventilation to dissipate paint fumes and overspray, which can be messy and hazardous.
- Waste: Can use slightly more paint due to overspray.
Brush painting
Pros:
- Less Prep Work: Minimal masking is needed as there’s little to no overspray.
- Greater Control: Easier for beginners to control paint application, reducing drips and runs.
- Lower Equipment Cost: Only requires brushes, rollers, and trays.
- Less Fumes: Generally less airborne paint and fumes compared to spraying.
Cons:
- Visible Brush Strokes/Roller Marks: It’s difficult to achieve a perfectly smooth, seamless finish.
- Slower Application: Can be very time-consuming, especially for multiple doors and detailed areas.
- Uneven Coverage: More prone to inconsistencies in paint thickness and potential streaks if not applied carefully.
- Can Be Challenging for Intricate Areas: Requires specific brushes and careful technique to get into all corners and moldings.
How to prepare cabinets for spray painting
Meticulous preparation is the most critical step in spray painting, accounting for 70-80% of the project’s success. Do not cut corners here!
- Empty Cabinets and Clear the Kitchen:
- Remove all items from inside the cabinets and drawers.
- Clear countertops and move small appliances.
- Disassemble Cabinets:
- Remove Doors and Drawer Fronts: Label each door and drawer front with a numbering system (e.g., masking tape on the hinge side/back) to ensure they go back in the correct place.
- Remove Hardware: Take off all hinges, handles, knobs, and drawer pulls. Store hardware safely.
- Clean Thoroughly:
- Kitchen cabinets accumulate grease, grime, and food residue. Use a strong degreaser (like TSP substitute or a dedicated kitchen cabinet cleaner) mixed with water.
- Scrub all cabinet surfaces, doors, and drawer fronts. Rinse thoroughly with clean water to remove all cleaner residue.
- Allow all surfaces to dry completely.
- Sanding:
- Scuff Sanding: Lightly sand all surfaces with 180-220 grit sandpaper. This isn’t to remove the existing finish but to create a dull, abraded surface that provides “tooth” for the primer to adhere to.
- Address Imperfections: For any deep scratches, dents, or chips, use wood filler or putty, let it dry, then sand smooth.
- Final Dust Removal: After sanding, vacuum all dust and then wipe down every surface with a tack cloth to pick up fine dust particles. This step is crucial for a smooth finish.
- Masking and Protection:
- Protect Surroundings: This is the most extensive part of prep for spray painting. Use painter’s tape and plastic sheeting or drop cloths to meticulously cover all areas you do not want painted: countertops, appliances, floors, walls, ceilings, inside cabinet boxes, and adjacent areas of the home.
- Ventilation: Set up fans and open windows to ensure maximum ventilation. Consider using an exhaust fan pointed outwards.
- Create a Spray Booth (Optional but Recommended): For cabinet doors and drawer fronts, setting up a temporary spray booth in a garage or well-ventilated area using plastic sheeting can greatly contain overspray and dust. Use sawhorses or specialized drying racks to elevate doors for easy spraying of all edges.
Step-by-step spray painting process
Once preparation is complete, the actual spray painting can begin. Work in a well-ventilated area, wearing appropriate PPE (respirator mask, safety glasses, gloves).
- Apply Primer:
- Choose the Right Primer: Use a high-quality bonding primer (e.g., shellac-based for knotty wood or strong stain blocking, or a water-based acrylic bonding primer) designed for cabinets. This ensures optimal adhesion and blocks stains.
- Mix Primer: Stir the primer thoroughly according to manufacturer instructions.
- Sprayer Setup: Fill your sprayer and adjust settings (pressure, fan pattern) based on the primer’s viscosity and the manufacturer’s recommendations. Test on a piece of cardboard.
- Application: Apply the first thin, even coat of primer to all cabinet surfaces (doors, drawer fronts, and cabinet boxes). Maintain a consistent distance from the surface (usually 6-12 inches) and use steady, overlapping passes (about 50% overlap).
- Dry Time: Allow the primer to dry completely as per manufacturer instructions (typically 1-4 hours for water-based, longer for oil-based).
- Light Sanding (Optional): Lightly sand the primed surfaces with 220-grit sandpaper to remove any nibs or imperfections, then wipe clean with a tack cloth.
- Apply First Topcoat:
- Mix Paint: Stir your chosen paint thoroughly. Thin paint if necessary according to sprayer manufacturer instructions (usually only for certain types of sprayers or paints).
- Sprayer Setup: Adjust sprayer settings for the paint.
- Application: Apply the first thin, even coat of your topcoat paint using the same consistent distance, speed, and overlapping passes as with the primer. Pay attention to edges and intricate details.
- Dry Time: Allow the first coat to dry completely. This is crucial for proper adhesion and to prevent lifting or runs on subsequent coats. This can take 4-8 hours or more depending on the paint type and humidity.
- Apply Second Topcoat (and Third, if Needed):
- Once the first coat is fully dry, apply the second thin, even coat. Two thin coats provide better durability and coverage than one thick coat.
- For lighter colors over dark cabinets, or for maximum durability, a third thin coat might be necessary.
- Again, allow full dry time between coats.
- Cure Time:
- While the paint may be dry to the touch in hours, it takes time to fully cure and harden (often 7-30 days, depending on the paint type and environmental conditions). Avoid harsh cleaning or heavy use during this curing period.
- Reassemble:
- Once the final coat is completely dry and has had some time to harden (usually 24-48 hours minimum), carefully remove all masking tape and plastic sheeting.
- Reinstall hinges, doors, drawer fronts, and hardware.
Best types of paint and sprayers to use
Choosing the right paint and sprayer is essential for achieving a professional finish.
Best paints for kitchen cabinets (for spraying)
- Acrylic Urethane Enamel: This is often the top recommendation for kitchen cabinets. It’s a water-based paint fortified with urethane, offering excellent durability, hardness, chemical resistance, and non-yellowing properties. It sprays beautifully and levels well.
- Alkyd (Oil-Based) Enamel: Provides an extremely hard, durable, and smooth finish. However, it has a longer dry time, higher VOCs, strong odor, and can yellow slightly over time, especially in lighter colors. Cleanup requires mineral spirits.
- Hybrid Alkyd/Urethane (Waterborne Alkyd): These paints combine the best properties of both. They are water-based for easy cleanup and low odor, but cure to a hard finish similar to oil-based paints. Excellent for spraying.
- Sheen: For cabinets, Satin or Semi-Gloss finishes are recommended. They are durable, washable, and provide a pleasing sheen. Glossy finishes show imperfections more readily.
Best sprayers for kitchen cabinets
- HVLP (High Volume Low Pressure) Sprayer:
- Pros: Ideal for cabinet work. Produces a fine, smooth finish with minimal overspray due to low pressure. Excellent for precision and detailed work. Uses less paint.
- Cons: Can be slower than airless for large surfaces. Requires paint to be thinned more. Requires more cleaning and maintenance.
- Best For: Professional-level finish, detailed work, less waste.
- Airless Sprayer:
- Pros: Very fast for large surfaces. Can handle thicker paints without much thinning. Good for painting entire cabinet boxes quickly.
- Cons: More overspray (requiring extensive masking). Can be harder for beginners to control, leading to runs if not careful. More expensive to rent or buy.
- Best For: Speed on larger, simpler surfaces, but requires skill for fine finishes on cabinets.
When to hire a professional vs. DIY
While spray painting kitchen cabinets is a popular DIY project, knowing when to call in the experts is crucial for optimal results and peace of mind.
DIY is suitable if:
- You have prior painting or spraying experience: Especially with fine finish work.
- You own or are willing to rent the right equipment: (e.g., an HVLP sprayer).
- You have ample time and patience for meticulous preparation: This is non-negotiable.
- You have a dedicated, well-ventilated space: Like a garage, to set up a temporary spray booth for doors and drawers.
- You are comfortable with potential trial and error: And the possibility that the finish might not be perfectly flawless on your first attempt.
Hire a professional (like Greater Boston Contractors) if:
- You desire a truly flawless, factory-like finish: Professionals have the experience, industrial-grade equipment, and specialized techniques to achieve superior results.
- Your cabinets are valuable or complex: If you have custom cabinetry, antique wood, or intricate designs, professional expertise minimizes risk.
- You lack the time or patience for extensive prep: Professionals handle all the tedious, time-consuming disassembly, cleaning, sanding, and masking.
- You don’t have suitable ventilation or a dedicated workspace: Professionals manage overspray and fumes safely.
- You want a guaranteed result: Professional painters typically offer warranties on their workmanship.
- You prefer convenience and peace of mind: Let experts handle the messy and demanding aspects of the job.
For homeowners, seeking a stunning and durable finish for their kitchen cupboards without the hassle, Greater Boston Contractors brings the expertise and equipment to deliver professional spray-painted cabinet results that will revitalize your kitchen.
Ready to transform your kitchen with beautifully spray-painted cabinets? Don’t settle for anything less than a smooth, flawless finish! Greater Boston Contractors offers expert kitchen cabinet spray painting services, ensuring meticulous preparation, high-quality materials, and a factory-like finish that will refresh your kitchen’s entire look. Contact us today for a consultation and a detailed estimate!