Painting kitchen cabinets is one of the most impactful home improvement projects you can undertake. While rolling and brushing are viable DIY methods, using a spray gun—whether an airless sprayer or an HVLP system—is the only way to achieve the smooth, durable, factory-like finish that professionals demand. This method requires careful preparation and technique, but the results are unmatched.
Greater Boston Contractors encourages homeowners to understand the high standards of finish quality. Here is your comprehensive guide to spraying cabinets successfully.
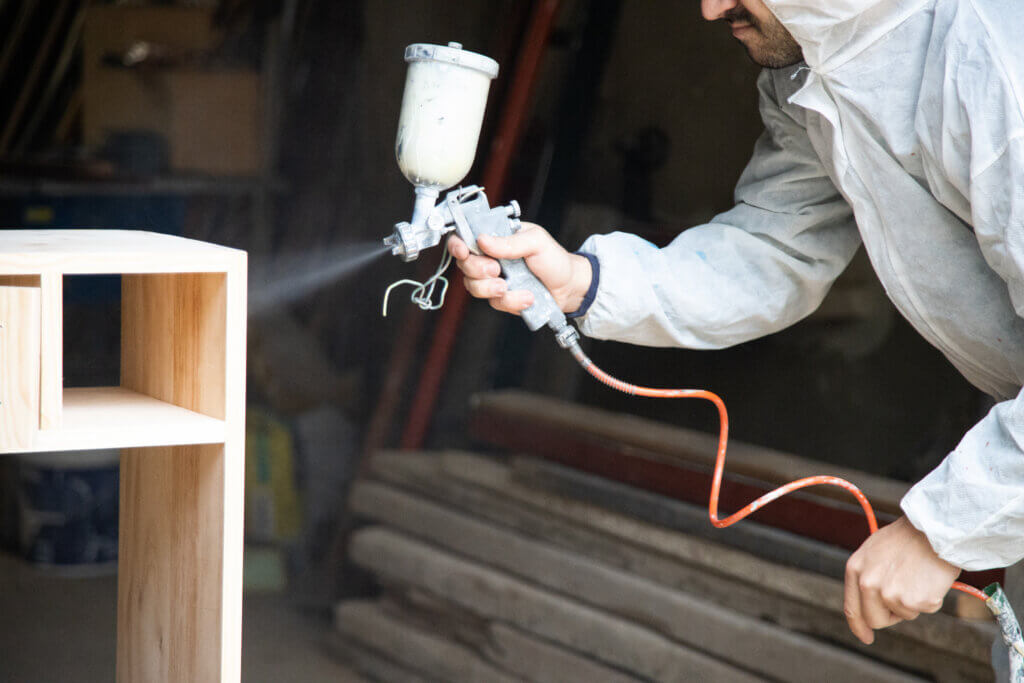
Is Spraying Cabinets Better Than Rolling or Brushing?
When assessing the results, spraying is almost always superior, though it comes with trade-offs in setup time.
Finish Quality Comparison
| Method | Finish Quality | Durability Potential |
| Spraying (HVLP/Airless) | Ultra-smooth, seamless, factory-like finish without texture or brush marks. | Highest potential durability because paint adheres uniformly without manipulation. |
| Rolling/Brushing | Always leaves a slight “orange peel” texture or visible brush strokes. | Good durability, but requires high-quality self-leveling paint to minimize texture. |
Time and Setup Considerations
- Spraying: The actual application time is incredibly fast (minutes per door). However, the setup, masking, and containment take the longest—often an entire day—as you must prevent airborne paint particles (overspray) from settling everywhere.
- Rolling/Brushing: Requires almost no setup, but the application is slow and meticulous. You must constantly watch for drips and work quickly with the paint’s wet edge.
Conclusion: If achieving a flawless, high-end look is your top priority, spraying is the only way to go.
What You Need Before You Start
A professional-grade finish starts with the right equipment and materials.
Spray Gun Types (HVLP vs. Airless)
- HVLP (High Volume Low Pressure): Recommended for beginners and fine finishes. It uses a high volume of air at low pressure to finely atomize the paint, resulting in less overspray and a very controlled, smooth application. Best for doors and drawers.
- Airless: Uses high pressure to force paint through a small tip. It is much faster and handles thicker, unthinned paint better, but generates far more overspray and is harder for beginners to control runs. Best for the large, stationary cabinet boxes.
Paint Types That Spray Well
Do not use standard wall paint. You need a paint designed for cabinets and trim:
- Cabinet-Grade Enamel: Look for a high-quality acrylic, alkyd, or hybrid enamel (like Benjamin Moore Advance or Sherwin-Williams Emerald Urethane). These products are designed to self-level and cure to a hard, durable finish.
- Thinning/Reduction: Most cabinet-grade paints must be thinned (reduced) with water, solvent, or a paint conditioner to achieve the correct viscosity for spraying. Always follow the gun and paint manufacturer’s recommendation (testing on scrap wood is mandatory).
Masking and Ventilation Requirements
- Masking: Use plastic sheeting (1 mil thickness or greater), painter’s tape, and pre-taped masking film to completely enclose the work area (walls, ceiling, floor, appliances). Containment is 80% of the spraying job.
- Ventilation: Spraying releases volatile organic compounds (VOCs) and massive amounts of paint mist. You need an industrial-grade respirator (not just a dust mask) and a powerful exhaust fan with filtration set up in a window or doorway to draw contaminated air outside.
Step-by-Step Cabinet Spraying Process
The quality of the final spray finish is a direct result of the effort put into the preparation steps.
Cleaning and Degreasing
Failure to clean is the #1 reason for paint peeling. Kitchen cabinets are covered in cooking grease and oil residue.
- Disassemble: Remove all doors, drawer fronts, and hardware. Label everything meticulously!
- Clean: Use a dedicated degreaser like TSP (Trisodium Phosphate) substitute or a strong commercial degreaser. Scrub all surfaces (fronts, backs, boxes) thoroughly until the rinse water runs clear and the surface feels squeaky clean.
Sanding and Priming
- Sanding: Lightly sand all surfaces (180-220 grit) to dull the existing finish and create a profile (tooth) for the primer to bond to. Wipe all sanding dust with a tack cloth or shop vacuum.
- Priming: Apply one to two coats of high-quality bonding primer. Shellac-based primers (like Zinsser B-I-N) or oil-based primers are often recommended for their superior adhesion over tough, glossy finishes. Spray the primer using the same technique as the final coat.
- Intermediate Sanding: After the primer cures, lightly sand any imperfections or grain lift (220-320 grit) to ensure a perfectly smooth base for the topcoat.
Spraying Technique and Coat Timing
- Set Up: Place doors on elevated stands (pyramids) in the spray booth.
- Technique: Hold the gun perpendicular to the surface at a consistent distance (usually 6 to 12 inches). Use smooth, overlapping passes, pulling the trigger after the pass begins and releasing it before the pass ends (to avoid heavy edges).
- Coat Timing: Apply thin, even coats. Multiple thin coats are always better than one thick coat. Allow the manufacturer’s specified flash time (usually 30 minutes to 2 hours) between coats to let the solvents evaporate before applying the next layer. Two topcoats are usually required, sometimes three for light colors.
Common Cabinet Spraying Mistakes
Avoid these pitfalls to ensure a professional, long-lasting finish.
Over-Spraying and Runs
- Cause of Runs: Holding the gun too close, moving too slowly, or over-thinning the material.
- Fix: If a run happens, do not touch it. Let the paint flash for 15-30 minutes, then use a dry brush to gently wick away the excess, or let it fully cure and sand it out before the next coat.
Improper Drying Time
The biggest mistake is rushing the process. If you apply the next coat too soon, the underlying layer’s solvents get trapped, leading to bubbling, cracking, and poor adhesion. Always adhere strictly to the manufacturer’s recoat window.
Skipping Proper Prep
As mentioned, neglecting to thoroughly degrease and sand the old finish is the primary cause of adhesion failure, where the new paint peels off in sheets later on. No amount of spraying skill can overcome poor preparation.
FAQs
Can beginners spray cabinets successfully?
Yes, but not without practice. Beginners should use an HVLP system and practice on scrap wood (or the back of a cabinet door) until they can achieve a consistent pattern without runs or drips. The learning curve is steep but short.
How long do sprayed cabinets take to cure?
There’s a difference between dry-to-touch and cured:
- Dry-to-Touch: 2–4 hours (safe to handle and flip).
- Recoat: 1–4 hours (safe to apply the next coat).
- Handle/Reassemble: 24–72 hours (safe to re-install).
- Full Cure: 7 to 30 days. This is when the paint achieves its maximum hardness and durability. Homeowners must treat the cabinets gently (no heavy scrubbing or harsh cleaners) during this curing period.
Is professional cabinet spraying worth the cost?
Yes, often it is. Professional painters use commercial-grade, two-part catalyzed lacquers or polyurethanes, which are far more durable than typical consumer-grade products. They also handle the dangerous ventilation, extensive masking, and the technical balancing of the spray equipment, all while offering a warranty on their work. The time saved and the flawless, long-term durability generally justify the investment.
Considering updating your kitchen with a durable, factory-grade finish? Leave the technical setup and finishing to the experts.
Contact Greater Boston Contractors today for a detailed quote on professional cabinet refinishing services!