Transforming a cold, damp basement into a comfortable, functional living space is one of the most rewarding home improvement projects. At the heart of this transformation lies basement wall framing – a process with its own unique set of challenges and best practices. Unlike framing above-ground walls, basements require careful consideration of moisture management, uneven surfaces, and specific material choices to ensure a strong, healthy, and lasting foundation for your new living area. This guide will walk you through the essential steps and crucial tips for framing basement walls effectively.
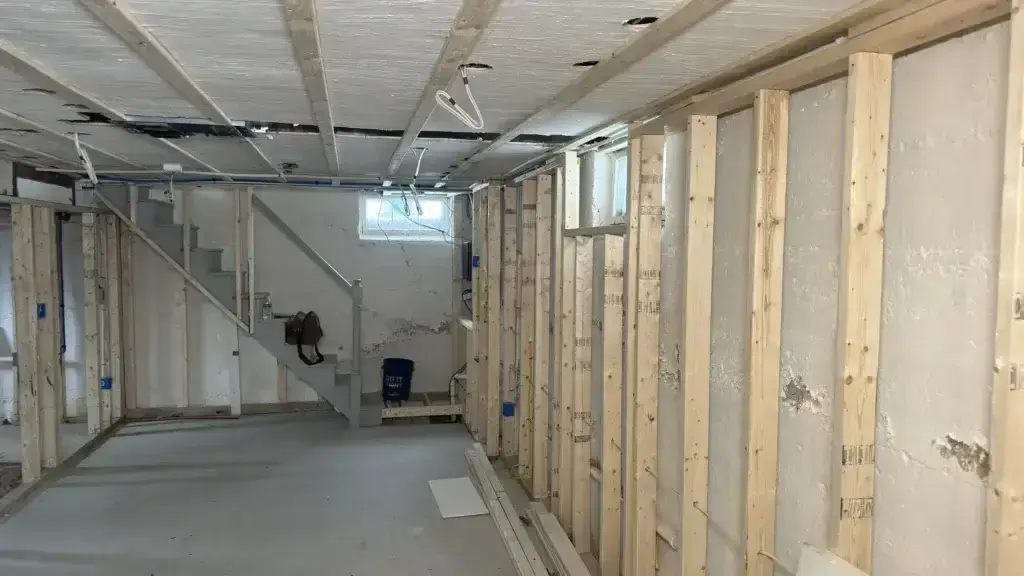
Challenges of basement wall framing (moisture, uneven floors)
Basements present distinct hurdles that must be addressed proactively during the framing process.
- Moisture Management: Basements are inherently susceptible to moisture. Concrete walls and floors can wick moisture from the ground, leading to humidity, condensation, and the potential for mold and mildew if not properly managed. This requires specific material choices and robust vapor barrier strategies.
- Uneven Floors and Walls: Concrete basement slabs are rarely perfectly level, and foundation walls can have irregularities. This can make establishing plumb and level framing a significant challenge, requiring careful shimming and adjustment.
- Existing Utilities: Basements often house furnaces, water heaters, plumbing stacks, electrical panels, and ductwork. Framing must be designed to work around these existing utilities, sometimes requiring creative solutions or bulkhead construction.
- Lack of Natural Light/Ventilation: While not directly a framing challenge, the inherent lack of light and ventilation in basements influences the design and layout, emphasizing the need for well-planned spaces.
Best materials for basement wall framing
Given the unique basement environment, material selection is critical for durability and mold prevention.
- Pressure-Treated Lumber for Bottom Plates: This is perhaps the most crucial material choice. Any lumber in direct contact with the concrete floor must be pressure-treated (PT) to resist moisture, rot, and insect infestation.
- Standard Kiln-Dried Lumber (2x4s or 2x6s) for Studs and Top Plates: For the vertical studs and top plates, standard kiln-dried lumber (typically 2x4s, but 2x6s are better for deeper insulation or wider utility runs) is acceptable, provided it is not in direct contact with concrete without a barrier.
- Foam Sill Sealer: A closed-cell foam gasket placed between the pressure-treated bottom plate and the concrete slab. This acts as a thermal break and a capillary break, further preventing moisture wicking and air leaks.
- Rigid Foam Insulation: Often preferred for basement wall insulation due to its excellent R-value per inch, moisture resistance, and ability to create a continuous thermal break against the cold concrete foundation wall.
- Vapor Barrier/Retarder: A plastic sheeting (typically 6-mil polyethylene) or specialized paint that prevents moisture migration. Its placement (warm side or cold side) depends on climate and specific building codes.
- Anchoring Hardware: Concrete screws (Tapcons), powder-actuated fasteners, or hammer-in anchors are used to securely attach the bottom plate to the concrete slab.
Step-by-step basement wall framing guide
Framing a basement requires a systematic approach to overcome its inherent challenges.
- Thorough Moisture Assessment and Mitigation:
- Inspect: Before starting, inspect for any active leaks, efflorescence (white mineral deposits), or signs of water intrusion. Address these issues first with exterior grading, downspout extensions, or interior drainage systems.
- Seal Cracks: Seal any cracks in the foundation walls or floor.
- Allow to Dry: Ensure the basement is thoroughly dry before beginning framing.
- Layout and Markings:
- Measure: Accurately measure and mark the proposed wall locations on the concrete floor using a chalk line.
- Transfer to Ceiling: Use a laser level or plumb bob to transfer these lines to the floor joists or concrete ceiling above.
- Identify Obstructions: Mark the locations of existing pipes, ducts, electrical boxes, and other utilities that the framing must accommodate.
- Install Foam Sill Sealer and Bottom Plates:
- Roll out the foam sill sealer along the marked lines on the concrete floor.
- Cut pressure-treated 2x4s (or 2x6s) to the length of each wall.
- Position the bottom plate over the sill sealer and securely attach it to the concrete floor using appropriate fasteners (concrete screws, powder-actuated fasteners) at regular intervals (e.g., every 16-24 inches).
- Cut and Assemble Walls (on the Floor):
- Measure the distance from the top of the installed bottom plate to the underside of the ceiling joists/concrete ceiling. This will be the length for your studs.
- Cut all common studs and any specific cripples or jack studs for openings.
- Lay out the top plate(s) and bottom plate parallel on the basement floor.
- Position all studs according to your 16″ or 24″ OC marks, and integrate any rough openings for doors.
- Nail/Screw: Assemble the wall sections using framing nails or screws, ensuring they are square and sturdy.
- Raise, Plumb, and Secure Walls:
- Raise: With assistance, carefully lift each assembled wall section into place, aligning the bottom plate over the previously installed pressure-treated plate.
- Plumb and Level: Use a long level to ensure the wall is perfectly plumb and level. Shims (non-organic, like plastic or composite) can be used between the pressure-treated bottom plate and the framed wall’s bottom plate to compensate for unevenness.
- Secure: Fasten the framed wall’s bottom plate to the pressure-treated bottom plate. Then, secure the top plate to the ceiling joists or blocking above using suitable fasteners. If fastening to concrete above, use appropriate concrete fasteners.
Adding insulation and vapor barriers
Proper insulation and vapor control are paramount for a healthy basement environment.
- Insulation Against Foundation Walls:
- Rigid Foam First: Many codes and best practices recommend installing rigid foam insulation directly against the concrete foundation walls first. This creates a continuous thermal break and acts as a moisture barrier. Secure it with appropriate fasteners and seal all seams with tape.
- Batt Insulation (Optional): If additional R-value is desired, batt insulation (fiberglass or mineral wool) can then be installed in the stud cavities of your framed wall. However, ensure no moisture can get trapped behind it.
- Vapor Barrier (if applicable):
- Placement is Key: The placement of a vapor barrier depends heavily on your climate zone and local building codes. In colder climates, it typically goes on the warm-in-winter side (interior side) of the insulation. In mixed climates, it might be omitted or a “smart” vapor retarder used.
- Continuous Seal: If using a poly sheeting vapor barrier, ensure it’s continuous and well-sealed at all seams, corners, and penetrations to effectively block moisture migration.
Mistakes to avoid in basement wall construction
Preventing these common errors will save time, money, and future headaches.
- Omitting Pressure-Treated Lumber: Using non-pressure-treated lumber directly on concrete is a recipe for rot and mold. Always use PT lumber for bottom plates.
- Neglecting Moisture Mitigation: Framing over existing moisture issues without addressing them first will lead to recurring problems like mold, mildew, and damaged finishes.
- Inadequate Leveling and Plumbing: Uneven basement floors and walls can be tricky, but rushing this step will result in wavy drywall, ill-fitting doors, and a generally unprofessional finish. Take your time to shim and adjust.
- Blocking Access to Utilities: Carefully plan around electrical panels, water shut-offs, cleanouts, and other access points. Frame removable panels or doors where necessary.
- Ignoring Local Building Codes: Basement finishing often requires permits and inspections. Codes dictate requirements for insulation, vapor barriers, egress windows, fire safety, and more. Always comply with local regulations.
- Not Planning for HVAC/Electrical: Ensure sufficient space in wall cavities for electrical wiring, outlets, and plumbing. Consider framing bulkheads for ductwork or beams.
Framing basement walls correctly sets the stage for a dry, comfortable, and beautiful finished space. By understanding the unique challenges and adhering to best practices for materials, moisture control, and structural integrity, you can ensure your basement renovation is a lasting success.
Ready to transform your basement into a functional living area? Greater Boston Contractors specializes in basement finishing and can ensure your project is built on a strong, dry foundation. Contact us today for a consultation!