Properly insulating a basement ceiling is a smart investment that can significantly improve your home’s comfort, energy efficiency, and even noise control. Unlike insulating walls or attics, basement ceiling insulation often serves dual purposes, impacting both the basement space and the living areas directly above it. Getting it right ensures maximum benefits and avoids potential issues down the line.
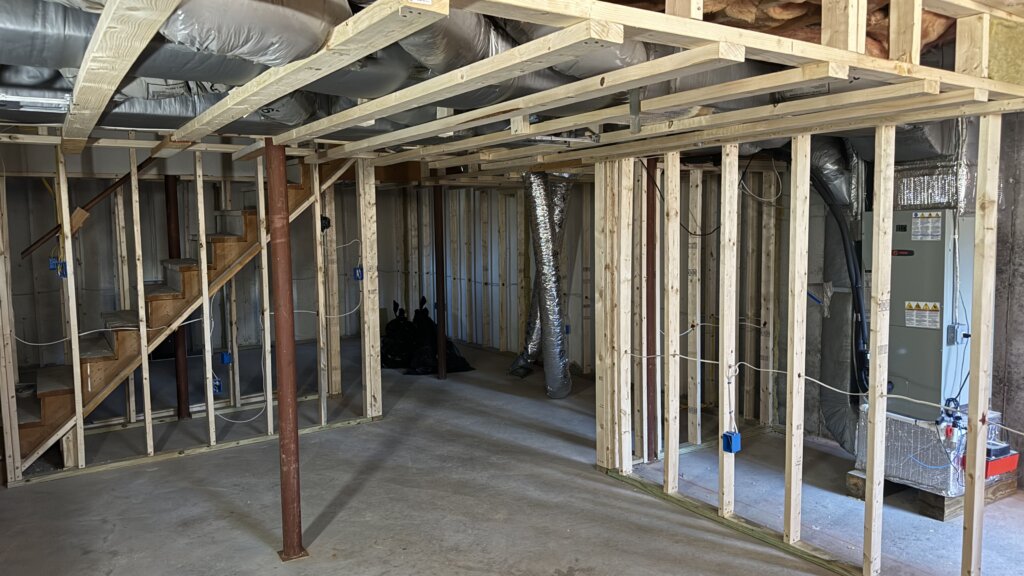
When should you insulate a basement ceiling?
Insulating a basement ceiling isn’t always a universal recommendation, but it becomes highly beneficial in specific scenarios:
- Unconditioned Basements Below Conditioned Space: If your basement is primarily an unfinished utility or storage space that you don’t heat or cool, insulating the ceiling helps to keep the conditioned air in your main living areas from escaping downwards. This is one of the most common reasons.
- Controlling Sound Transfer: When you have a laundry room, home theater, noisy HVAC system, or even a play area in the basement, insulating the ceiling acts as a sound buffer, reducing noise transmission to the floors above. Conversely, it can also dampen noise from upstairs in a finished basement.
- Preventing Cold Floors Upstairs: If the floors on your first level feel consistently cold, especially in colder climates, insulating the basement ceiling can help retain heat in the living spaces, making them more comfortable.
- Before Finishing the Basement: If you plan to finish your basement and want to control noise between floors or temper the temperature impact from a utility area (like a furnace room) within the finished space, it’s an opportune time to insulate the ceiling.
- Pipes and Ducts: Insulating the ceiling can help protect water pipes from freezing in very cold, unconditioned basements, though insulating the pipes directly is also crucial. It can also make ductwork more efficient if the ducts are within the insulated ceiling cavity.
Types of insulation materials (batts, foam, panels)
Choosing the right insulation material is foundational to a proper installation. Each type has its strengths and ideal applications.
- Fiberglass Batts:
- Description: The most common and often most affordable option, available in pre-cut rolls or batts designed to fit snugly between joists. Available faced (with a paper or foil vapor barrier) or unfaced.
- Pros: Good thermal performance (R-value), decent sound dampening, relatively easy for DIY installation.
- Cons: Can be irritating to skin and lungs; requires careful handling and proper PPE. Compression reduces effectiveness.
- Mineral Wool Batts:
- Description: Made from spun molten rock or slag, resulting in a denser material than fiberglass.
- Pros: Excellent fire resistance, superior sound absorption qualities compared to fiberglass, good thermal performance, less irritating to handle. Naturally resistant to mold and moisture.
- Cons: Heavier and typically more expensive than fiberglass.
- Spray Foam (Open-Cell and Closed-Cell):
- Description: Applied as a liquid that expands and hardens, creating an excellent air seal. Requires specialized equipment and professional application.
- Pros: Superior thermal performance (high R-value per inch), creates a highly effective air barrier, good sound blocking, conforms to irregular spaces around pipes/wires. Closed-cell foam also acts as a vapor barrier.
- Cons: Most expensive option, requires professional installation, curing fumes require proper ventilation.
- Rigid Foam Boards (Panels):
- Description: Made from materials like extruded polystyrene (XPS), expanded polystyrene (EPS), or polyisocyanurate (polyiso). Comes in sheets that are cut to fit.
- Pros: High R-value per inch, moisture-resistant, relatively easy to cut for specific fits. Good for insulating rim joists or when combining with other insulation types.
- Cons: More expensive than batts, requires precise cutting for a tight fit, gaps need to be sealed with spray foam or tape. Can be a fire hazard if not covered by a fire-rated material like drywall.
R-Value Considerations: The recommended R-value for your basement ceiling depends on your climate zone and goals. For unconditioned basements below heated spaces, an R-value of R-11 to R-25 is typically recommended. In colder climates, higher R-values (R-19 to R-25) are more appropriate for thermal control.
Step-by-step installation process
For batt or rigid foam board insulation in an accessible, open joist ceiling, here’s a general step-by-step guide for proper installation:
- Preparation and Safety:
- Inspect and Address Moisture: Before anything else, ensure your basement is dry. Fix any leaks, address drainage issues outside, and manage humidity with a dehumidifier if necessary. Never insulate over existing moisture problems, as this can trap water, leading to mold, mildew, and rot.
- Clear the Area: Remove any debris, old insulation, or obstructions from the joist bays.
- Gather Tools and PPE: You’ll need a utility knife, measuring tape, straight edge, caulk gun, staple gun (for faced batts), insulation supports/wires, and crucial PPE: heavy-duty gloves, safety glasses, long sleeves/pants, and a respirator.
- Air Sealing (Crucial Step):
- Before installing insulation, seal any air leaks in the ceiling. Use fire-rated caulk or expanding foam around penetrations like pipes, electrical wires, and ductwork that pass through the floor above.
- Seal gaps where the joists meet the sill plate/rim joist at the perimeter of the basement.
- This step is vital because insulation slows heat transfer, but an air barrier stops air movement, which is often the biggest source of energy loss.
- Measure and Cut Insulation:
- Measure the width and length of each joist bay.
- Cut insulation batts or rigid foam boards to fit snugly between the joists. For batts, cut them about 1/2 to 1 inch wider than the cavity to ensure a friction fit. Never compress the insulation when cutting or fitting, as this reduces its R-value.
- Install Insulation:
- Batts: Gently push the batts into the joist cavities. They should fill the space completely from top to bottom (against the subfloor above) without being compressed.
- If using faced batts, the paper or foil facing (vapor barrier) should generally face the warm-in-winter side of the ceiling (i.e., upwards towards the first floor living space in most climates). Staple the flanges to the bottom edge of the joists.
- If using unfaced batts, you may need insulation supports (wire hangers or plastic netting) to hold them in place against the underside of the subfloor above.
- Rigid Foam Boards: Cut precisely to fit tightly between joists. Secure them with construction adhesive designed for foam or with mechanical fasteners. Seal all seams between boards and around the perimeter with approved foam board tape or canned spray foam for an airtight seal.
- Batts: Gently push the batts into the joist cavities. They should fill the space completely from top to bottom (against the subfloor above) without being compressed.
- Address Utilities (See next section): Carefully insulate around pipes, wires, and ducts.
- Vapor Barrier (if needed): Depending on your climate and local building codes, a separate vapor barrier might be required over unfaced insulation. Typically, a 6-mil polyethylene sheeting is used and carefully taped at seams. However, for basement ceilings, particularly in humid climates, adding an unnecessary vapor barrier on the “cold” side can sometimes trap moisture, so consult local codes or a professional.
Dealing with exposed pipes and wiring
Navigating existing utilities in the ceiling cavity is a critical part of proper insulation.
- Pipes:
- Hot Water Pipes: Insulate hot water pipes with pipe insulation sleeves before installing ceiling insulation to improve hot water delivery efficiency. Ensure there’s no direct contact between fiberglass insulation and very hot pipes, or verify the insulation is rated for high temperatures.
- Cold Water Pipes: Insulating cold water pipes can reduce condensation, especially in humid basements.
- Fitting Insulation: Cut insulation batts to fit snugly around pipes, rather than compressing them over the pipes. You might need to split a batt lengthwise to run insulation on both sides of a pipe. For larger pipes, cut sections of insulation to fit above and below the pipe, maintaining contact with the subfloor above as much as possible.
- Electrical Wiring:
- Safety First: Always prioritize safety. Never staple through or compress insulation around electrical wires.
- Run Behind/Around: Most residential wiring can be run behind batt insulation, directly against the subfloor above. Gently tuck insulation around wires to avoid compressing them.
- Recessed Lighting: Ensure any recessed light fixtures are IC-rated (Insulation Contact) if you plan to cover them with insulation. Non-IC rated fixtures require an air gap (often created with a protective box or barrier) to prevent overheating and fire hazards.
- Ductwork:
- If ductwork is running through the ceiling joists, insulate around the ducts. If the ducts are uninsulated, consider insulating the ducts themselves with duct wrap before installing ceiling insulation to improve HVAC efficiency.
- Ensure there are no gaps around the ducts where air can bypass the insulation.
Safety tips and moisture control
Proper safety and moisture management are paramount for a successful and healthy insulation project.
- Personal Protective Equipment (PPE): This is non-negotiable. Always wear:
- Respirator/Dust Mask: To prevent inhaling insulation fibers.
- Safety Glasses/Goggles: To protect eyes from particles.
- Heavy-Duty Gloves: To prevent skin irritation.
- Long Sleeves and Pants: To minimize skin exposure.
- Ventilation: Ensure good ventilation in the basement during and after installation, especially if using spray foam or sealants.
- Electrical Hazards: Turn off power to relevant circuits at the breaker box before working near electrical wiring or fixtures. Do not staple through electrical wires.
- Moisture Control:
- Address Water Intrusion: Fix all leaks (foundation cracks, plumbing leaks) before insulating. Insulation installed over damp surfaces will fail and can lead to mold and rot.
- Humidity Management: Use a dehumidifier in the basement, especially in humid climates, to maintain relative humidity below 60%.
- Vapor Barriers: Understand your climate and local building codes. In many climates, the first floor is conditioned, and the basement is not, so the “warm-in-winter” side is upstairs. Placing a vapor barrier on the basement ceiling (i.e., on the basement side of the insulation) could potentially trap moisture from humid basement air. However, if your basement is conditioned, the vapor barrier usually goes on the basement side. When in doubt, consult a professional or local building official.
DIY vs. Hiring a contractor
The choice between a DIY project and professional installation depends on your skills, budget, and the chosen insulation type.
DIY (Do-It-Yourself):
- Pros: Saves on labor costs. Offers satisfaction of completing the project yourself.
- Cons: Can be physically demanding and time-consuming. Risk of improper installation (gaps, compression, incorrect vapor barrier placement) which reduces effectiveness. Limited to batt or rigid board insulation.
- Best For: Homeowners comfortable with detailed work, physical labor, and strict adherence to safety guidelines. Ideal for straightforward, open joist bays with minimal obstructions.
Hiring a Professional:
- Pros: Expertise in insulation types, proper installation techniques, and building codes. Efficient and faster completion. Access to specialized equipment for spray foam or blown-in insulation. Can provide comprehensive air sealing solutions. Often offers warranties on work.
- Cons: Higher upfront cost.
- Best For:
- Considering spray foam or blown-in insulation.
- Basements with complex layouts, numerous pipes, wires, and ducts.
- When aiming for maximum energy efficiency and soundproofing.
- If you’re unsure about moisture management strategies or local code requirements.
- If time and physical exertion are concerns.
Properly insulating your basement ceiling is an investment that contributes significantly to your home’s comfort, energy performance, and indoor air quality. By following these guidelines and making informed decisions about materials and methods, you can ensure a successful and long-lasting result.
Ready to enhance your home’s comfort and efficiency with professional basement ceiling insulation? Greater Boston Contractors specializes in comprehensive insulation solutions, ensuring proper installation, optimal performance, and lasting benefits for your home. Contact us today for a free estimate and let us help you achieve a more comfortable and energy-efficient living space!