Installing roof shingles is a challenging yet rewarding DIY project that can significantly enhance your home’s protection and curb appeal. While demanding, proper technique and attention to detail can lead to a long-lasting and professional-looking result. This guide will walk you through the essential steps, from gathering your tools to the final ridge cap, ensuring you understand the critical elements for a successful shingle installation.
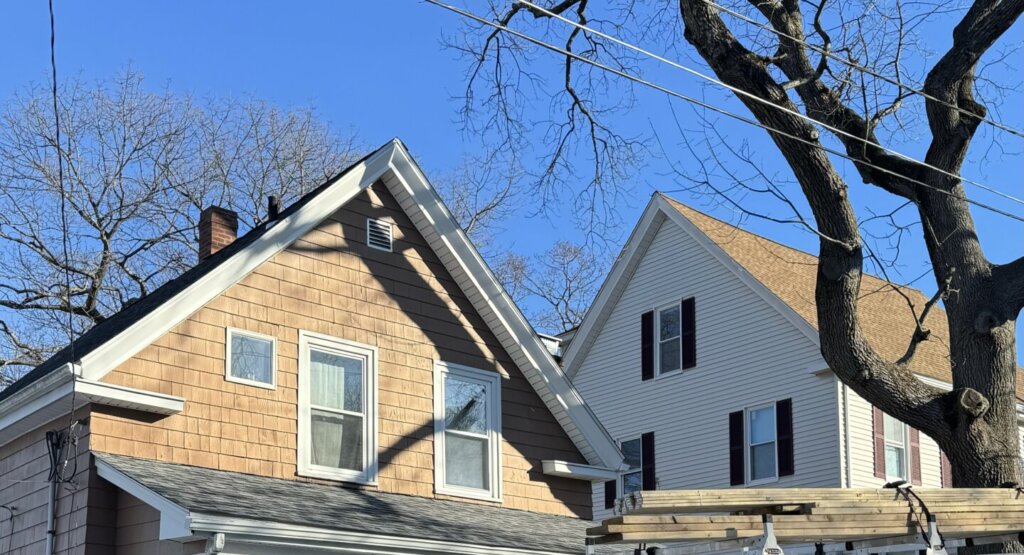
Tools and safety gear required
Before you begin, prioritize safety and gather all necessary tools and materials. Working on a roof carries inherent risks, so proper safety gear is paramount.
Safety Gear:
- Safety Harness and Rope System: Essential for working on pitched roofs, especially above one story. Anchor securely.
- Safety Glasses/Goggles: To protect eyes from debris and nail ricochets.
- Work Gloves: Protect hands from cuts, scrapes, and rough materials.
- Sturdy Work Boots: Non-slip soles are crucial for traction on pitched surfaces.
- Hard Hat: Protects against falling objects or accidental head impacts.
- Dust Mask/Respirator: Especially important during tear-off to avoid inhaling dust, old shingle particles, and mold spores.
Tools:
- Roofing Hammer or Hatchet: Specialized hammer for driving nails and having a blade for cutting shingles.
- Utility Knife: With extra heavy-duty blades for cutting shingles.
- Tape Measure: For accurate measurements.
- Chalk Line: For creating straight reference lines.
- Pry Bar or Shingle Ripper: For removing old shingles and nails during tear-off.
- Hammer Tacker or Staple Gun: For fastening felt paper/underlayment.
- Caulk Gun: For applying roofing cement or sealants.
- Tin Snips: For cutting flashing materials.
- Ladder: Sturdy, extension ladder rated for roof work.
- Roofing Nail Gun (Pneumatic or Cordless – Optional but Recommended): Significantly speeds up installation and ensures consistent nail depth.
- Air Compressor and Hose (if pneumatic nailer).
- Shingle Scraper/Spud Bar: For efficient tear-off.
- Broom/Leaf Blower: For cleaning the roof deck.
- Saw (Circular or Reciprocating): For repairing damaged sheathing.
Materials:
- Asphalt Shingles: Calculate total square footage and add 10-15% for waste.
- Roofing Nails: 1″ to 1.25″ galvanized or stainless steel roofing nails (smooth or ring shank). Ensure they are long enough to penetrate the sheathing.
- Ice-and-Water Shield: Self-adhering membrane for eaves, valleys, and penetrations (required in many cold climates).
- Roofing Felt/Synthetic Underlayment: Applied over the entire roof deck (except where ice and water shield is).
- Drip Edge: Metal flashing for the eaves and rake edges.
- Valley Flashing (if applicable): Metal flashing for roof valleys.
- Roofing Cement/Sealant: For sealing flashing and critical areas.
- Ventilation products: Ridge vents, soffit vents (if not already present).
- Replacement Sheathing (if needed): OSB or plywood.
Prep work: Tear-off and underlayment
Thorough preparation is the most critical step for a long-lasting roof. Do not skip or rush this phase.
- Protect the Property: Lay down large tarps or plastic sheeting around the perimeter of your home to catch debris during tear-off. Protect landscaping, driveways, and anything susceptible to damage.
- Tear Off Old Shingles:
- Start at the top of the roof (ridge) and work your way down.
- Use a shingle scraper or pry bar to lift and remove old shingles. Work in manageable sections.
- Remove all old roofing nails. Use a magnetic sweeper to collect nails that fall to the ground.
- Dispose of old shingles properly according to local regulations (often in a dumpster or specialized recycling center).
- Inspect and Repair Roof Decking (Sheathing):
- Once all old materials are removed, thoroughly inspect the roof sheathing (plywood or OSB) for any signs of water damage, rot, softness, delamination, or pest infestation.
- Replace any compromised sections of sheathing. Cut out damaged areas and patch with new, appropriately-sized sheathing, ensuring it’s nailed securely to rafters/trusses. Ensure all replacement sheathing meets local building codes for thickness and fastening.
- Install Drip Edge:
- Install metal drip edge along the eaves (bottom edges) of the roof first. Fasten it to the fascia board.
- Then, install drip edge along the rake edges (sloping sides) of the roof. It goes over the underlayment at the rake.
- Drip edge helps direct water away from the fascia and prevents water from wicking back under the shingles.
- Install Ice-and-Water Shield:
- In colder climates or areas prone to ice dams, apply a self-adhering ice-and-water shield membrane.
- Apply it along the eaves, typically extending from the edge of the roof up the roof deck at least 2 feet past the interior wall line.
- Also apply it in valleys, around chimneys, skylights, and other roof penetrations. Overlap seams according to manufacturer instructions.
- Install Roofing Felt or Synthetic Underlayment:
- Starting from the bottom of the roof and working your way up, roll out rows of roofing felt (15-lb or 30-lb asphalt felt) or synthetic underlayment directly over the roof sheathing, overlapping the ice-and-water shield.
- Overlap horizontal courses by at least 2-4 inches (check manufacturer instructions). Overlap vertical seams by at least 6 inches.
- Secure the underlayment with a hammer tacker or staple gun, ensuring it’s smooth and free of wrinkles. This provides a secondary waterproof barrier.
Installing starter shingles
The starter course is crucial for proper shingle alignment and preventing water intrusion at the eaves.
- Cut Off Tabs: For traditional 3-tab or architectural shingles, cut off the tabs (the visible lower portion) of the first row of shingles. This leaves you with just the headlap (the upper, solid portion).
- Orient Correctly: Flip these cut shingles upside down so the adhesive strip (tar line) faces upwards and is positioned towards the eave edge.
- Align and Fasten: Align the bottom edge of the starter shingles with the drip edge, ensuring it overhangs slightly (1/4 to 3/4 inch, consult shingle manufacturer specs).
- Fasten the starter shingles with roofing nails. Place nails along a line approximately 3-4 inches up from the bottom edge, evenly spaced, usually 6-8 inches apart. Ensure nails penetrate the sheathing.
- Offset First Shingle: For the very first shingle of the starter course, cut 6 inches off one end. This offsets the joints of the starter course from the first full course of shingles above it, preventing a direct path for water.
Aligning and nailing each course
Consistency in alignment and proper nailing technique are vital for a successful, long-lasting roof.
- Establish a Vertical Line (Optional but Recommended): For long roof sections, use a chalk line to snap a vertical line up the center or near one end of the roof. This helps maintain a straight course as you work across the roof.
- Snap Horizontal Chalk Lines: Use a chalk line to snap horizontal lines across the roof deck to ensure each shingle course is perfectly straight.
- For 3-tab shingles, these lines should be at multiples of 5 inches (or the exposure of your specific shingle type).
- For architectural shingles, follow manufacturer recommendations, which often involve using the shingle’s internal alignment features or guides.
- Start the First Full Course: Begin the first full course of shingles at the eave. Use a full, uncut shingle (or a shingle cut to the proper offset, typically 6 inches from the rake edge) and align its bottom edge with the top edge of the starter course.
- Nailing Technique:
- Number of Nails: Typically, 4 nails per 3-tab shingle or 6 nails per architectural shingle (check manufacturer for specific requirements, especially for high-wind areas).
- Nail Placement: Nails must be driven through the nailing strip of the shingle (the area just below the adhesive strip) and penetrate the roof sheathing completely. Do not nail too high or too low.
- Depth: Nails should be driven flush with the shingle surface – not underdriven (leaving the head proud) and not overdriven (breaking the shingle surface). This is where a nail gun with depth adjustment is beneficial.
- Even Spacing: Space nails evenly across the shingle.
- Stagger Shingles and Offset Joints:
- Crucial for Waterproofing: The key to proper shingle installation is to always offset the joints of successive courses. Never allow a joint in one course to align directly with a joint in the course above or below it.
- Typical Offsets: For 3-tab shingles, offset joints by half a tab, a full tab, or by 6 inches or more, depending on the pattern you’re creating. For architectural shingles, follow the manufacturer’s suggested offset.
- Working Up the Roof: Continue laying courses, aligning the bottom edge of each new shingle course with your chalk lines or the top of the shingle below, and always maintaining the proper offset.
Flashing and ridge cap shingles
Proper flashing around roof penetrations and a correctly installed ridge cap are essential for a watertight and complete roof system.
- Valley Flashing (if applicable):
- For roof valleys (where two roof planes meet), install valley flashing (typically metal) before shingling the adjacent planes.
- There are two common methods:
- Open Valley: The metal flashing remains exposed, and shingles are cut along its edge.
- Closed Valley: Shingles extend across the valley, covering the flashing, with a cut line along the center.
- Ensure the metal is properly bent and secured, and shingles are trimmed back to prevent damming.
- Step Flashing:
- Used where a roof plane meets a vertical wall (e.g., against a chimney, dormer, or perpendicular wall).
- Install L-shaped metal flashing pieces individually with each shingle course. The horizontal leg goes under the shingle, and the vertical leg goes up the wall.
- Counter-flashing (a second layer of flashing over the step flashing, often mortared into masonry) is then installed on the vertical surface to shed water over the step flashing.
- Pipe Flashing:
- For plumbing vents or other circular pipes, use pre-fabricated rubber or metal pipe boots/collars.
- Slide the boot over the pipe. Install shingles below the boot first, then lay shingles over the top flange of the boot, securing it. Seal the top edge with roofing cement.
- Chimney Flashing:
- Requires a combination of step flashing along the sides, apron flashing at the bottom, and cricket flashing (a small diversionary roof) on the uphill side of wider chimneys to shed water around them.
- All flashing should be integrated with the shingle courses and often counter-flashed into the chimney masonry.
- Ridge Cap Shingles:
- These are the final shingles installed at the very peak (ridge) of the roof. They cover the joint where the two sloped roof planes meet.
- Use pre-manufactured ridge cap shingles or cut individual shingles to create caps.
- Install them from either end of the ridge, overlapping each other and nailing them through the top portion, covered by the next cap shingle. Ensure the final cap is securely sealed.
- If installing a ridge vent, install the vent system before the ridge cap shingles, as the cap shingles will cover the vent.
Mistakes to avoid for lasting results
Avoiding these common errors will significantly improve the longevity and appearance of your roof.
- Rushing Surface Prep: Inadequate tear-off, leaving old nails, or not repairing damaged sheathing will lead to a bumpy, unstable base and premature shingle failure.
- Poorly Installed Underlayment/Flashing: Any gaps or improper overlaps in the underlayment or flashing are direct pathways for water to penetrate, leading to leaks and rot.
- Improper Nailing:
- Under-driving nails: Nails not flush with the shingle can tear through the shingle above.
- Over-driving nails: Nails driven too deep or tearing the shingle can cause blow-offs.
- Nailing in the wrong spot: Nails outside the nailing strip won’t hold properly and can lead to leaks.
- Too few nails: Insufficient fasteners reduce wind resistance.
- Incorrect Shingle Overlaps/Offsets: Failure to maintain proper shingle exposure and offset joints creates weak points where water can penetrate and wind can lift shingles. “H” patterns are a sign of improper staggering.
- Working in Unsafe Conditions: Attempting roofing work in wet, icy, or extremely windy conditions is highly dangerous. Always prioritize safety.
- Ignoring Manufacturer Instructions: Each shingle type and manufacturer has specific installation guidelines. Deviating from these can void warranties and compromise performance.
- Not Considering Ventilation: Proper attic ventilation (soffit and ridge vents) is crucial for a healthy roof. It helps prevent heat buildup (which ages shingles prematurely) and moisture accumulation (which can lead to mold and rot).
- Working Alone: Roofing is a multi-person job. Having a helper for safety, material handling, and efficiency is highly recommended.
- Not Cleaning Up Debris: Leaving nails or old shingle pieces on the roof can damage new shingles or cause injury.
While challenging, installing your own roof shingles can be a rewarding project. However, if you are uncomfortable with heights, lack the proper safety gear, or are unsure about any steps, it is always best to hire a qualified and licensed roofing professional.