Painting a ceiling might seem like a daunting task, often synonymous with neck pain and paint drips. However, with the right tools, meticulous preparation, and a few expert techniques, you can achieve a perfectly smooth, streak-free finish that brightens any room. A freshly painted ceiling can dramatically enhance the overall look of your space, making it feel cleaner, taller, and more inviting. Greater Boston Contractors provides this step-by-step guide to help you tackle ceiling painting like a pro and achieve flawless results.
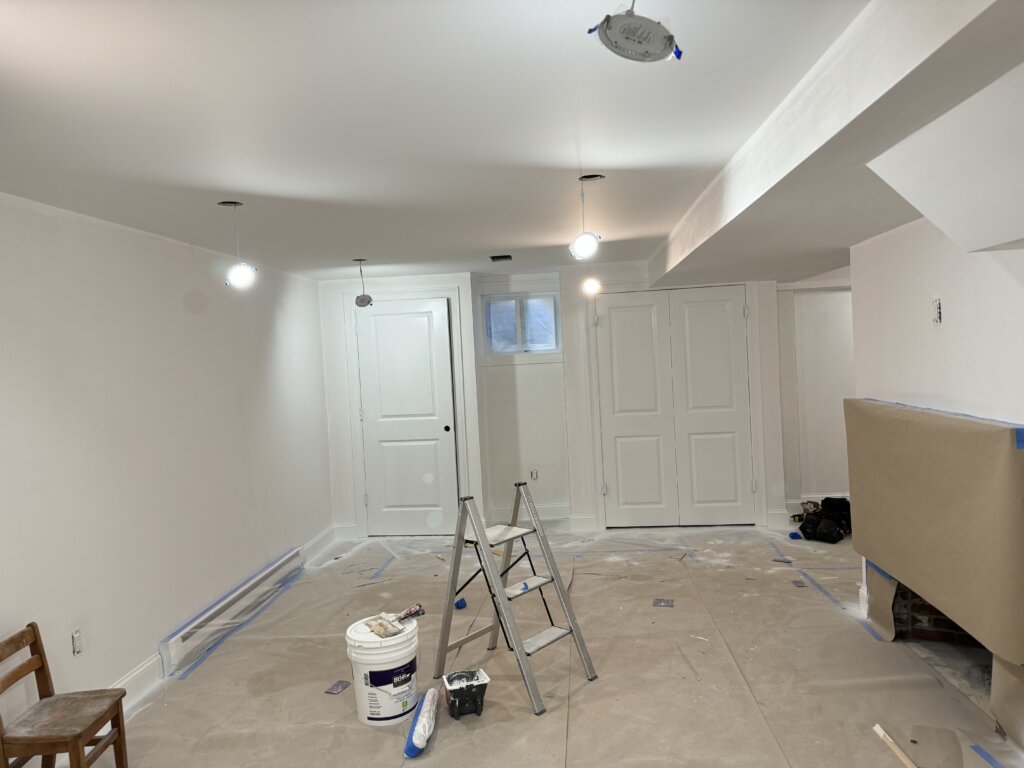
Tools and supplies you’ll need
Having all your materials ready before you begin is crucial for an efficient and successful ceiling painting project.
- Safety Gear:
- Safety glasses
- Dust mask (for cleaning/sanding)
- Old clothes/protective gear
- Cleaning Supplies:
- Mild all-purpose cleaner or TSP substitute
- Two buckets (one for cleaning solution, one for rinse water)
- Sponges or clean rags
- Patching/Repair Supplies (if needed):
- Spackling compound or joint compound
- Putty knife
- Fine-grit sandpaper (220-grit)
- Protection:
- Plastic sheeting or lightweight drop cloths (to cover furniture and floor completely)
- Painter’s tape (blue or green low-tack tape)
- Pre-taped plastic sheeting (optional, for quick masking)
- Paint:
- Ceiling paint (specific type and sheen, see below)
- Paint tray
- Paint mixer or stir stick
- Applicators:
- High-quality paint roller frame (standard 9-inch)
- Extension pole (essential for reaching ceilings without a ladder)
- Roller covers (nap size appropriate for your ceiling texture, typically 1/2-inch to 3/4-inch for smooth to lightly textured ceilings)
- Angled sash brush (2-2.5 inches, for cutting in)
- Access:
- Sturdy step ladder or stepladder
How to prep the room and surface
Thorough preparation is the most critical step in achieving a professional finish and minimizing cleanup. Don’t skip these steps!
- Clear the Room:
- Remove all furniture from the room if possible. If not, move it to the center of the room and cover it completely with plastic sheeting or drop cloths.
- Remove all wall decor, light fixtures (turn off power at the breaker first!), smoke detectors, and any ceiling vents. Label hardware and keep it safe.
- Protect Floors and Walls:
- Lay down drop cloths or plastic sheeting to cover the entire floor. Extend them generously to catch any drips or splatters.
- Use painter’s tape to carefully mask off the top edge of your walls where they meet the ceiling. Press the tape firmly to create a crisp line and prevent paint bleed-through. If painting walls later, you don’t need to tape.
- Cover any built-in fixtures, shelves, or cabinets with plastic sheeting.
- Clean the Ceiling:
- Ceilings accumulate dust, cobwebs, and grease (especially in kitchens). Use a broom with a clean cloth wrapped around it or a vacuum cleaner with a brush attachment to remove loose debris.
- Then, clean the entire ceiling surface with a mild all-purpose cleaner or TSP substitute diluted in water. Use a clean sponge or rag. Rinse with clean water and a separate clean sponge/rag.
- Allow the ceiling to dry completely. Any moisture can prevent paint adhesion.
- Inspect and Repair Imperfections:
- Look for cracks, holes, nail pops, or flaking paint.
- Apply spackling compound or joint compound with a putty knife to fill any imperfections. Smooth it out as much as possible.
- Allow the compound to dry fully.
- Lightly sand the repaired areas smooth with fine-grit (220-grit) sandpaper.
- Wipe away all dust with a tack cloth or damp rag (allow to dry if damp) before painting.
Best paint type and sheen for ceilings
Choosing the right paint is essential for a beautiful and long-lasting ceiling.
- Paint Type:
- Specialized Ceiling Paint: This is generally the best choice. Ceiling paints are typically water-based (latex), have a flat finish (see below), and are formulated for excellent coverage, minimal splatter, and a quick-drying, uniform appearance. Some include a primer.
- Primer: If your ceiling is stained (e.g., water stains), very dark, or you’ve made extensive repairs, apply a stain-blocking primer (like a shellac-based or high-quality water-based primer) before the ceiling paint. This ensures uniform color and prevents bleed-through.
- Sheen (Finish):
- Flat (or Matte): This is overwhelmingly the recommended sheen for ceilings.
- Pros: Its non-reflective nature hides imperfections (like bumps, dips, or roller marks) incredibly well. It provides a soft, uniform look that absorbs light rather than reflecting it, making the ceiling appear higher and less distracting. It also tends to provide better coverage.
- Cons: Less durable and washable than higher sheens. However, since ceilings typically don’t endure much wear or need frequent cleaning, this is usually not an issue.
- Eggshell: Can be used if you want a very subtle hint of sheen, but it will show more imperfections than flat.
- Avoid Satin, Semi-Gloss, or Gloss: These highly reflective finishes will amplify every imperfection (roller mark, patch, or unevenness) on your ceiling, making them visually distracting. They are much harder to apply smoothly on a large, flat overhead surface.
- Flat (or Matte): This is overwhelmingly the recommended sheen for ceilings.
Rolling techniques to avoid streaks
Achieving a streak-free ceiling requires proper roller technique and a systematic approach.
- Load the Roller Properly:
- Pour a moderate amount of paint into your paint tray.
- Dip the roller cover into the paint, rolling it back and forth on the ribbed part of the tray to ensure it’s evenly loaded, but not dripping. Too much paint will cause drips and unevenness; too little will create streaks.
- Work in Manageable Sections:
- Mentally divide your ceiling into 3-4 foot by 3-4 foot squares or strips. This helps you manage wet edges.
- Use a W-Pattern or M-Pattern:
- Start rolling about a foot away from a corner.
- Apply paint in a “W” or “M” pattern across your section. Without lifting the roller, fill in the pattern by rolling horizontally across the section. This ensures even coverage.
- Maintain consistent pressure.
- Maintain a Wet Edge:
- The key to avoiding streaks is to always roll into a “wet edge” of previously applied paint. This prevents lap marks, which occur when you roll over paint that has already started to dry.
- Work systematically from one side of the room to the other (e.g., from one end wall to the other), always overlapping your previous section while the paint is still wet.
- Roll in One Direction for the Final Pass (Optional, but Recommended):
- For the final pass on each section, do a light roll in one consistent direction (e.g., perpendicular to the main light source, like a window). This helps to create a uniform texture and minimize roller marks.
- Don’t Overwork the Paint:
- Once paint starts to dry, leave it alone. Going back over it will create texture and streaks.
- Apply Two Thin Coats:
- Most ceilings will require two coats for full, even coverage and a flawless finish. Allow the first coat to dry completely before applying the second.
Tips for cutting in around edges
Cutting in refers to painting the edges and corners where your roller can’t reach. This needs to be done carefully for crisp lines.
- Use a Quality Angled Sash Brush: An angled brush provides better control for cutting in straight lines.
- Load the Brush Correctly: Dip only about 1-2 inches of the brush into the paint. Tap off excess paint on the side of the can or tray – don’t wipe it on the rim, as this loads only one side of the brush.
- Start with the Cut-In:
- Before you start rolling, use your brush to “cut in” a 2-3 inch wide strip of paint around the entire perimeter of the ceiling where it meets the walls.
- Also cut in around any light fixtures, vents, or other obstacles on the ceiling.
- Steady Hand Technique:
- For crisp lines against taped walls, press the bristles gently against the tape and guide the brush steadily along the edge.
- For corners, use the tip of your angled brush to get into the crevice.
- Work in Sections with the Roller:
- Cut in a section of the ceiling (e.g., one full wall length), then immediately follow with your roller in that area, overlapping the wet cut-in line. This helps to blend the brush strokes with the roller texture, preventing visible lines.
- Do not cut in the entire room at once, as the paint will dry before you can roll, leading to visible lines.
Drying and cleanup process
Patience during drying and thorough cleanup are the final steps to a successful ceiling paint job.
- Drying Time Between Coats:
- Refer to your paint can’s label for specific recoat times. Most latex ceiling paints are dry to the touch in 1-2 hours but require 2-4 hours before recoating.
- Ensure adequate ventilation during drying by opening windows and using fans (but don’t point fans directly at the wet paint, as this can cause uneven drying or accelerate drying too much).
- Final Dry Time:
- Allow the final coat to dry for at least 24 hours (or as recommended by the manufacturer for “dry to the touch” or “light use”) before moving furniture back or reinstalling fixtures.
- Full paint cure can take 7-30 days, during which the paint reaches its maximum hardness and durability. Avoid vigorous cleaning during this period.
- Cleanup:
- Remove Painter’s Tape: Carefully peel off painter’s tape while the paint is still slightly damp (but not wet or tacky) or completely dry. If you wait too long, the tape might pull off dried paint. Pull the tape at a 45-degree angle away from the painted surface.
- Clean Tools:
- Water-based paints: Clean brushes and roller covers immediately with warm water and soap until the water runs clear. Spin rollers dry or wrap them in plastic bags for reuse.
- Oil-based paints: Require mineral spirits or paint thinner for cleanup.
- Dispose of Paint: Properly dispose of leftover paint and cleaning solutions according to local regulations. Do not pour paint down drains.
- Gather Drop Cloths: Carefully fold drop cloths inward to contain any dried paint flakes or dust.
Painting a ceiling, though demanding, is a highly rewarding DIY project that can significantly refresh your home. By diligently following these steps, you’ll achieve a flawless finish that brightens your space for years to come. For larger projects, or if you prefer to leave it to the experts, Greater Boston Contractors offers professional painting services to deliver impeccable results for your home.